Microsoft has long been integrating password security in its Office products and continually enhancing protection capabilities. MS Word, for example, has seen a massive evolution in encryption technology since the early days of its release. In this article, we'll talk about how to go about protecting your Word documents with a password in various versions of the world's most famous word processor program.
Part 1 : How to Add Password to Word 2003 and 2007
To be honest, Word 2003 or 2007 is a pretty old version comparing to the latest Word release. However, it is still largely used on Windows XP and Vista computers as new version is not working well on them because of incompatible system library. If your computer is still running Word 2003 or 2007, then follow the steps below to add a password to it.
Step 1: Locate the Word document to be password protected and open it with Word application.
Step 2: Click the Office icon at the upper right corner and select Save As.
Step 3: From the pop-up window, click the Tools button at the left side of Save button. There are five optiosn available. Choose General Options... at this time.
Step 4: Now input a password at the field called 'Password to Open'. Click OK to save the edit and you need to input the password to open the document next time.
Part 2: How to Add Password to Word 2010 and 2013
Word 2010 was a big jump from the earlier Word 2007, but Word 2013 pretty much carried a lot of the same encryption options. As such, the method for password-protecting a Word 2010 versus Word 2013 is quite similar except for some minor cosmetic changes. And new encryption method is imposed to prevent hackers recovering password from Word.
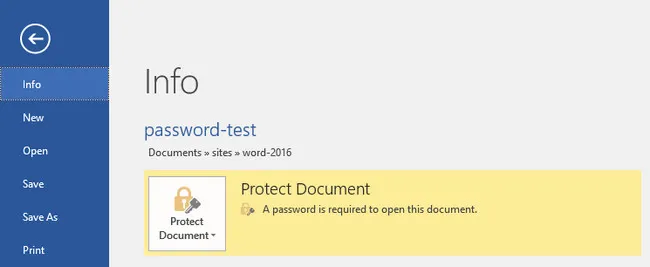
Step 1: Open the Word document you want to protect. Go to File, and then to Info.
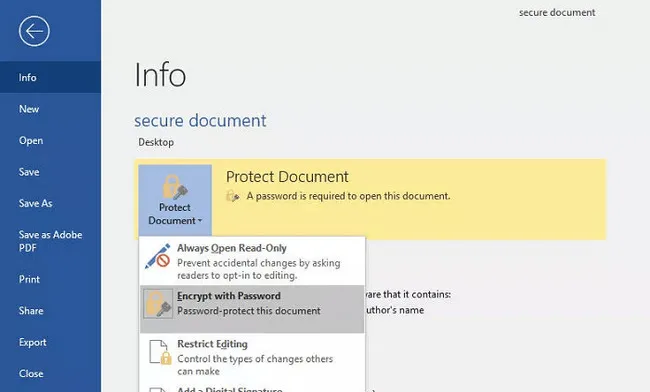
Step 2: In the Info window, you'll see a padlock-and-key icon, with Permissions displayed next to it. When you click on the Protect Document drop-down under the icon, you'll see three options. The first is to apply restrictions to the document and make it read-only. The second is to Encrypt with Password, which is the option we want.
Step 3: Click on that. You'll also see an option for Restrict Editing, but you can ignore that for now.
Note: The above step is relevant to Word 2010. In Word 2013, the word Permissions has been changed to Protect Document, and the dropdown will have four options, the extra one being an option to Add a Digital Signature. We need to click on the second option here as well (Encrypt with Password.)
Step 4: Enter a unique, long and strong password for best protection. Confirm it in the next window and click OK to set it.
The above method works on both versions of Word. It also works on Word 2016 the same way, but there is an alternative method of setting the password that you should be aware of. It's simple, easy to do and allows you to set both the Open password as well as Restrict Editing password in the same window.
Part 3: How to Password Protect Word 2016
To protect an MS Word 2016 file, there's another option aside from the File > Info method. When the file is open, click the File > Save As… option and proceed with the steps below:
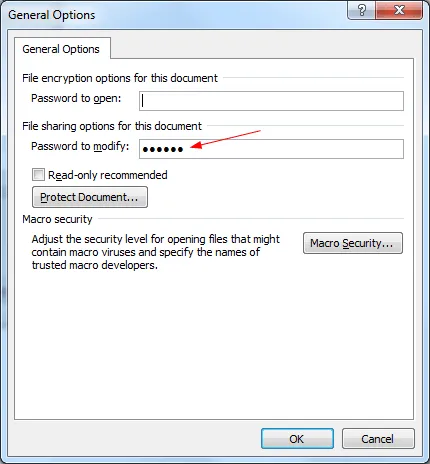
Step 1: Click on Browse and then look for the Tools drop-down menu button at the bottom next to the Save and Cancel buttons. Click on it and select General Options…
Step 2: In the new window that pops up, you can specify an Open or a Modify (Restrict Editing) password, or both.
Step 3: When you click OK, it will ask you to confirm either or both passwords depending on which you set. Click OK after typing in the password(s) again and hit Save in the main Save As… window.
Part 4: How to Set a Password Word 2019 and Office 365
With this version of Word, Microsoft moved to a cloud-based service. When you purchase an Office 365 subscription, you get access to a web-based version of Word 2019 that you can activate under the same subscription. If you purchase Office 2019 as a standalone product, you'll get the traditional Office software that you can download and install on your PC. The password protection method is almost the same as in older Word versions, but Microsoft has included an option called Restrict Access by People in addition to the three discussed under Word 2010 and 2013.
The process is the same as on other versions. Open the file, click on File > Info and click on Protect Document to see the Encrypt with Password option. Click it and enter the password twice before confirming. When you go back to File > Info after this, you'll see that the password has been applied and the file is now encrypted.
Conclusion
As you can see, the password protection process is fairly similar in all recent versions of Word starting from Word 2010 through Word 2019 and Office 365. However, the encryption technology underlying this feature have gone through significant changes over the years. Today's documents are protected by advanced 256-bit and 512-bit AES encryption with Cipher Block Chaining or CBC.
Recovering Word password is impossible unless you have hacking tools to help you remove the password, and trying to get in without the password is impractical at best. It is important that sensitive documents be protected with unique and long but easy to remember passwords. That way, your documents will be well-protected, and you won't have a hard time remembering the access passwords.