File protection can be very useful whether you're sharing private documents, using a shared computer or you're on an open network. Folders that are encrypted with password are generally secure and resilient to hacking attempts or even simple unauthorized access. While Windows offers its own way of password protecing folders with its BitLocker utility, there are others that are equally powerful. Here's a quick look at some of the best options when you want to password protect a folder in Windows 10.
Method 1: How to Put a Password on a Folder in Windows Using 7-Zip
This popular open-source archiving tool is also great for securing files with a password. The method to do it is a little roundabout, admittedly, but it is a versatile utility that allows you to compress files into the ZIP format or extract content from ZIP. Once you install the program, you'll see it in the contextual menu when you right-click the document in File Explorer. This makes is super-convenient because you always have it at your fingertips. In contrast, most other utilities for password protection require you to first import files into the program for encryption. Here's an overview of how to password protect a file using 7-Zip.
Step 1: Download the latest 32-bit or 64-bit version of 7-Zip from the official website here and run the .exe file to complete the installation.
Step 2: You can either right-click on the document in File Explorer and select 7-Zip, then Add to Archive, or you can import the file into 7-Zip if you're already running the program.
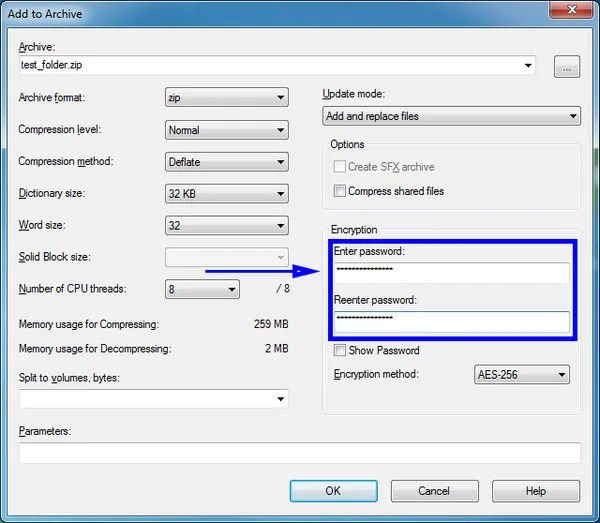
Step 3: In the Add to Archive window, choose ZIP as your preferred format and AES-256 as encryption method. You can also choose the .7z format or another encryption standard if you want. Under Encryption, enter a new password twice in the fields provided, and hit the OK button at the bottom to confirm.
This method creates an encrypted ZIP version of your original file, which you can then proceed to share or save to an archive location on your PC.
Method 2: How to Password Protect Folder on Windows with Rohos Mini Drive
To protect files in an entire USB drive or a partition thereof, one of the best tools is Rohos Mini Drive. There is also a portable version that can be run from a different USB instead of having to install it and then run it. The advantage of using this tool is that you can encrypt a specific partition if you don't want to password protect the entire drive. And you can do it without admin privileges. All you need to do is set a password, and you're done. Here's the step-by-step process.
Step 1: Install Rohos Mini Drive on your PC or as a portable version on a USB flash drive.
Step 2: Run it on the computer using the shortcut or just run it off the USB for the portable version. The latter is available as a ZIP file containing two components - the Rohos Mini Drive program and special Disk Browser utility, which can be used to lock your program files in the main C: directory. The ZIP file does not need to be installed prior to running the program.
Step 3: Click on the option called Encrypt Folder , which will cause a new window to pop up.

Step 4: Your drive will be scanned automatically and the appropriate partition settings will be applied. You just need to input a new password in the two fields provided, hit Create Disk, and you're done in just a few moments.
This way of protecting your files offers multiple advantages. You can carry around the encryption program on a USB stick, and you can very quickly encrypt any USB drive and put your files in the secure partition, which will have the root directory as Rohos.
Method 3: Use BitLocker to Password Protect a Folder in Windows 10
BitLocker is the default encryption utility in Windows Pro and Enterprise editions, and has been around for a long time. Unfortunately, not many Windows users are aware that this is an ideal solution for volume encryption. One of the drawbacks is that you need BitLocker to view encrypted content as well, which means you'll need workaround methods if you're trying to get access to them on a Mac or a Linux machine. Nevertheless, BitLocker offers superior encryption and is well regarded by the security community. Here are the steps to encrypt an entire drive with BitLocker.
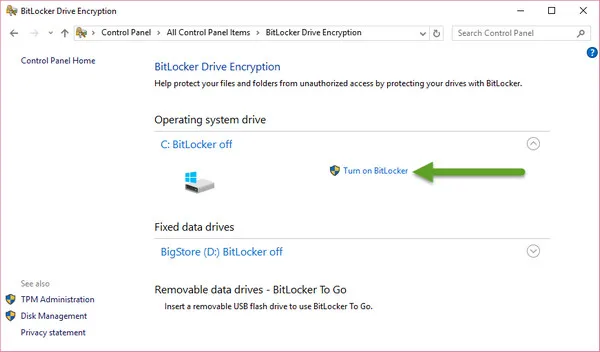
Step 1: In the Pro or Enterprise editions of Windows, you can simply right-click the drive (under Devices and Drives) and select Turn on BitLocker in the menu that appears. This enables the feature, after which you'll be using the Wizard to set up the rest of it.
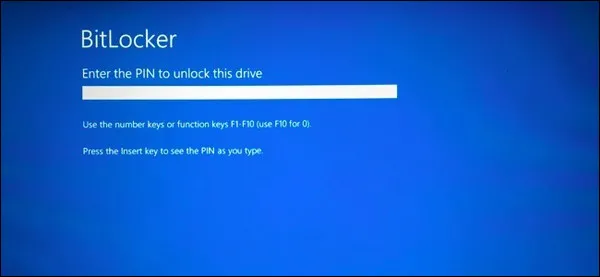
Step 2: The next step is to choose the unlock method for the drive that's about to be encrypted. You can use either a simple password or use a USB drive as a key to decrypt the protected drive. The second method is only possible when not protecting another USB drive, for obvious reasons.
Step 3: In the next stage, a recovery key will be generated for you. This is in case you forget the password or lost the USB key. However, if you're printing it out, make sure it's kept safe. Anyone in possession of the recovery key will be able to effortlessly open your locked drive.
Step 4: Once you start putting files into the encrypted drive, the files themselves are automatically encrypted to BitLocker standards. When you do this for the first time, you'll find that encrypting entire drive takes a lot longer than just doing it for the existing files on the drive. However, encrypting the whole volume is preferable in the long run.
Step 5: In Windows 10, there's a new option called XTS-AES, which is an enhanced version of the traditional AES standard and first debuted in Windows Build 1511. On older Windows computers, it will automatically default to the more flexible Compatible Mode, but you can choose XTS by selecting the New Encryption Mode option.
Step 6: After a final confirmation, click on Start Encrypting. Unless you plan on doing this to your system volume, you won't have to worry about the additional system check. Your drive will now be encrypted in a matter of minutes or hours, depending on the size and whether you chose to encrypt the entire drive in Step 4 above.
BitLocker does have some major disadvantages. We've already mentioned one, but other gripes include drive errors and other problems. If you're facing any of these, try one of the other methods and tools described here.
Method 4: Put a Password to Folder via Veracrypt Software (Windows & Mac)
Another very popular utility is VeraCrypt, which creates an encrypted volume - a container - on your drive. You just have to read the instructions in the VeraCrypt Volume Creation Wizard and you'll be done in a few minutes. Your files on that volume will be encrypted, with new file additions being automatically processed. The software boldly offers to create a hidden volume in case you can't help revealing the password to the attacker. This protects users in many extortion cases where the hacker isn't aware that there's a hidden and encrypted drive.
VeraCrypt is fairly simple to use even if you don't have any experience. That's one of the reasons for its popularity.
Step 1: After installing the program, click the Create Volume button to get things started.
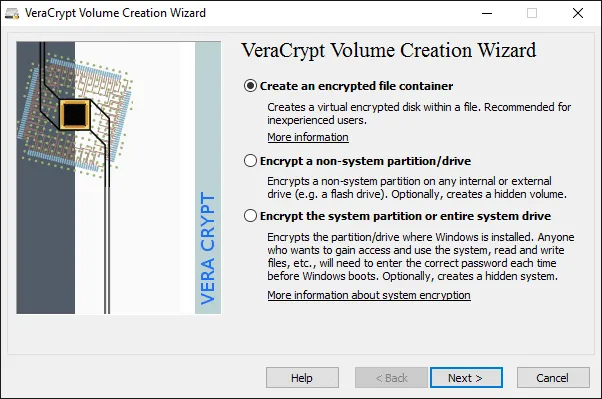
Step 2: In the next window, use the default method that creates an encrypted file container for a virtual encrypted volume where you can then store your private files.
Step 3: You can leave the next couple of steps in default settings. They're basically about the type and location of the secure container, and its name.
Step 4: Hitting Save on the final page will create the disk-within-file container setup that VeraCrypt is known for.
Note: You can't encrypt file that's already there. You need to create a new container and then move that file to the new and secure location. If you attempt to do this in the final step before saving, it will delete the file and create the container over it, NOT encrypt it.
Method 5: How to Password Protect Folder via Cloak Encrypt Software
One of the best features of Cloak Encrypt is that it is cross-platform across desktop and mobile devices. Technically speaking, it doesn't use password encryption. Rather, it uses key management services to authorize specific users to access the files. These users designated by person encrypting the file, and the recipient can sign in using Facebook, Google, and other methods to authenticate themselves. As you can imagine, the setup process is a little more tedious than other methods, but it ensures a password-free option that's ultimately more secure.
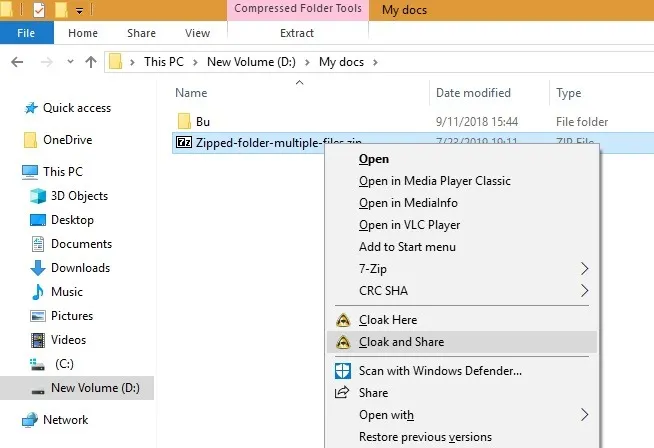
Step 1: Depending on the OS, the first steps may vary slightly. In Windows, it's as easy as installing the Cloak program and accessing it via the contextual menu.
Step 2: Once you've installed the software, just right-click on the file you wish to encrypt and choose Cloak Here or Cloak and Share. For the second option, you'll be asked for the email IDs of recipients.
Step 3: Once you click the final OK, your file will be encrypted, and only the recipients of the email will be able to access it. People can also request access to the encrypted file, which you can either approve or deny, as the case may be.
Summary
These five utilities are some of the best file protection solutions on Windows. Choose the one you prefer based on how frequently you require password protection, who it's going to be shared with, what operating systems your colleagues are on, and so on.